
 Bookmark
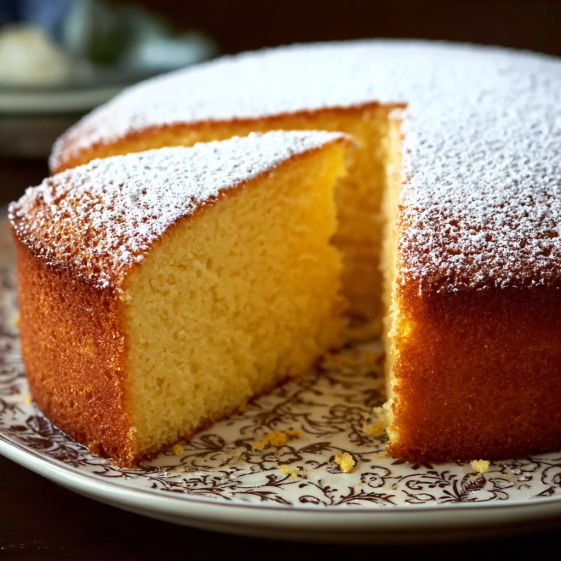
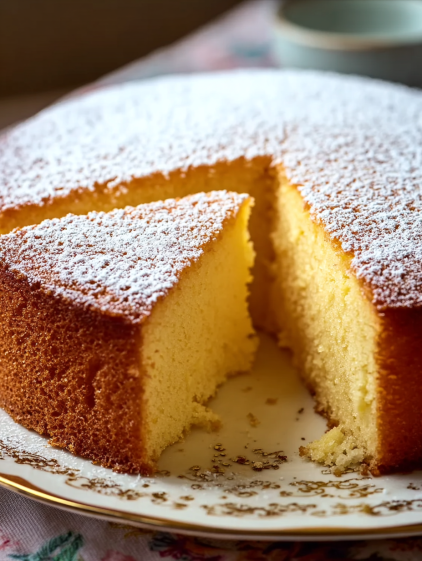
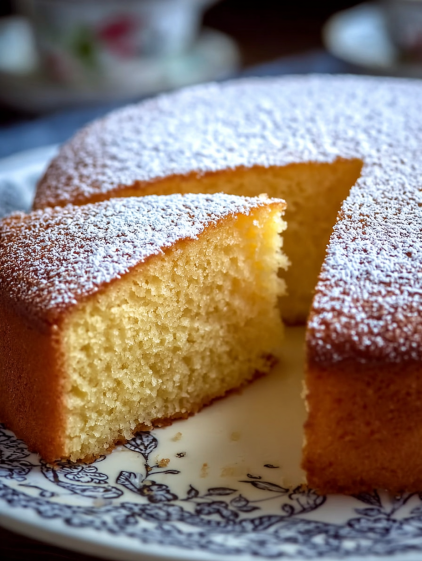
This classic sponge cake is the kind of versatile treat you will want to keep in your baking rotation. Its airy crumb and delicate sweetness let it shine on its own or as a base for strawberries and cream, chocolate glaze, or your favorite birthday filling. I still remember baking it for my mother’s birthday one spring and watching everyone go back for seconds because it was just that fluffy and light.
When I first made this sponge cake I was amazed at how just a few familiar ingredients could create something that tastes so special and celebratory. Now it is my go to any time I need a failproof cake for guests or family.
Ingredients
- All purpose wheat flour: gives the cake its delicate structure Look for finely milled fresh flour for best results
- Granulated sugar: adds sweetness and helps the eggs whip to volume Use superfine sugar if possible for a smoother batter
- Eggs: crucial for structure and fluffiness Choose the freshest eggs you can find
- Melted butter: brings moisture and richness Unsalted butter at room temperature works best
- Baking powder: ensures a high airy rise Make sure your baking powder is not expired for maximum lift
- Vanilla extract: rounds out flavor and adds depth Use real vanilla for the best aroma
- Pinch of salt: balances the sweetness and sharpens flavors Sea salt or fine table salt both work
Step by Step Instructions
- Bring Ingredients to Room Temperature:
- Allow eggs and butter to sit on the counter for at least 30 minutes before baking This ensures they blend smoothly and help create an even crumb
- Prep the Pan and Oven:
- Grease a 24 centimeter round cake pan with butter then dust with flour so the cake releases easily Set your oven to 180 degrees Celsius so it reaches full temperature by the time the batter is ready
- Whip Eggs and Sugar:
- Combine eggs and sugar in a large bowl then beat on high with a hand mixer for five to seven minutes The mixture should become pale thick and at least double in volume This is the foundation of a fluffy sponge
- Combine Dry Ingredients:
- Whisk flour baking powder and salt in a separate bowl Sifting ensures no lumps and an even rise
- Fold Dry Ingredients into Egg Mixture:
- Add dry ingredients to whipped eggs in small batches Use a spatula making gentle sweeping motions to avoid deflating the batter Stop folding as soon as you see no streaks of flour
- Add Butter and Vanilla:
- Pour cooled melted butter and vanilla extract down the side of the bowl Gently incorporate with your spatula just until the mixture is even A soft hand here keeps your sponge light
- Bake the Cake:
- Pour the batter into your prepared pan and smooth the top Bake for 25 to 30 minutes The cake should be golden and spring back when touched Insert a skewer in the center If it comes out clean the cake is done
- Cool and Unmold:
- Let the cake cool in its pan for ten minutes then gently turn it out onto a wire rack Finish cooling completely before slicing or layering This helps keep the crumb tender and prevents collapse
- Serve as Desired:
- This sponge is perfect alone dusted with sugar or paired with cream fruit or layers of your favorite filling I love slicing mine into layers and sandwiching them with raspberry jam for a simple treat
Eggs are my favorite ingredient in this cake because they give amazing height and softness You should have seen the look of pride on my daughter’s face the first time her carefully whipped sponge turned out pale golden and perfect We now bake it together for family birthdays and special weekends
Storage Tips
Sponge cake keeps moisture quite well but should be stored tightly wrapped at room temperature for up to three days If you want to keep it longer freeze whole layers after wrapping them securely in plastic and foil When ready to serve thaw at room temperature before filling or decorating
Ingredient Substitutions
For a dairy free version use neutral oil in place of butter but add it carefully to avoid deflating the eggs If you want a gluten free cake try a good quality gluten free blend but check that it includes a binder like xanthan gum For extra flavor add citrus zest or use almond extract as a twist
Serving Suggestions
This cake shines with a dusting of powdered sugar and a handful of berries or as the foundation of a layered strawberry cream cake It is also wonderful used as a base for tiramisu Instead of slicing plain sometimes I toast wedges under the broiler and serve with a dollop of yogurt and honey
Cultural and Historical Context
Sponge cake is a true classic across Europe and beyond Appearing in British Italian and Polish kitchens for generations it is prized for being celebratory yet simple It became especially popular in the late nineteenth century as eggs and refined flour became easier to find Every family seems to have their own little secret Mine is to never rush the egg whipping stage patience here gives you the most elegant slice
Common Recipe Questions
- → Jak uzyskać puszystą strukturę biszkoptu?
Najważniejsze jest długie ubijanie jajek z cukrem oraz delikatne łączenie składników suchych, by nie utracić napowietrzenia masy.
- → Czy masło można zastąpić innym tłuszczem?
Tak, można użyć oleju roślinnego lub margaryny, ale masło daje ciastu bogatszy smak i lepszą wilgotność.
- → Jak sprawdzić, czy ciasto jest dobrze upieczone?
Wbij patyczek w środek wypieku – gdy wyjdzie suchy, oznacza to, że ciasto jest gotowe do wyjęcia z piekarnika.
- → Z czym najlepiej serwować biszkopt?
Świeże owoce, bita śmietana, kremy lub czekoladowa polewa doskonale pasują do tego klasycznego wypieku.
- → Jak przechowywać biszkopt, by zachował świeżość?
W szczelnym pojemniku lub owinięty folią spożywczą, najlepiej w chłodnym miejscu. Biszkopt utrzymuje świeżość kilka dni.
- → Czy można przygotować biszkopt dzień wcześniej?
Tak, ciasto świetnie nadaje się do przygotowania z wyprzedzeniem. Przechowuj je właściwie, by pozostało wilgotne.